Draft Your Own Circular Flounce Sewing Pattern
A flounce can elevate any garment by creating a flowing or fluttery effect and the best part is that it can be added to almost any part of a garment!
When drafting your own sewing pattern, it’s helpful to understand the basic principles and parts of a circular flounce. This is why I decided to share some of those details on this blog post.
Some of the fundamentals are determining the desired length and width of your flounce, understanding how these measurements can change the flare and drape of the flounce. Below you will also find a summary of the steps on how to draft your pattern and sew your flounce. But if you're more of a visual person like me, then click the image below to watch the video where I show you my preferred method of creating a circular flounce.

By the end of the video, you'll have all of the information you need to draft a flounce pattern that fits your specific needs and preferences. Whether you're an experienced sewer or a beginner, this mini tutorial is perfect for anyone looking to add some extra flair to their next sewing project.
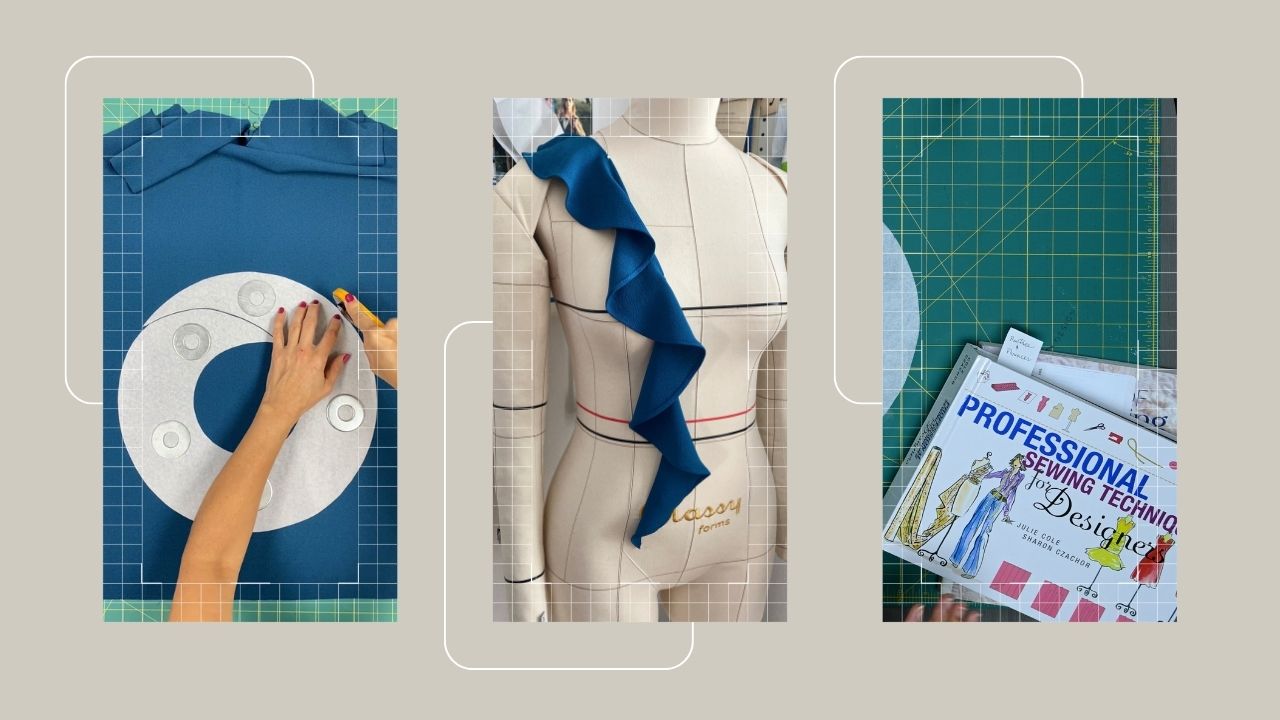
Basic Principles: You will need two measurements to draft this circular flounce, one for the radius of the inner circle and one for the depth of the flounce. Note that the smaller the radius the greater the flare (you may need to connect several circles to get the needed length.) When trying to determine the depth of your flounce, take into consideration the type of fabric, placement and desired look or drape (as the depth measurement increases, it also increases the flaring).

Drafting the pattern:
- Determine your radius based on the type of flare you want (remember that the smaller the radius, the greater the flare).
- Use a string compass or quilting circular ruler to draw your circle.
- Measure out the depth of your flounce and draw the outer circle (this is the floating edge of the flounce).
- Add seam allowance to both the inner and outer circles.
- Draw your grainline and use this line to indicate the opening of your flounce (this will become the end points/seam lines of the flounce).
A few variations/ideas for end points:
- Straight edges on both ends (especially if you will be connecting several circles to create a longer flounce).
- One straight edge and one curved edge (see illustration above).
- Taper each end by decreasing the width measurement (this variation is a great option when your flounce is placed vertically).
Sewing:
- Always measure the length of your flounce seam and the garment seam before you start sewing. TIP: If your flounce is slightly longer than your seamline, stitch a row of basting stitches to the flounce seam edge, gently pull up easing and steam-press the edge. This will slightly shrink your flounce.
- Hem your flounce with your preferred method (narrow or rolled hem [can be done with or without a rolled hem foot], add a decorative serged edge, or simply leave the raw edge exposed).
- Sew your flounce to your designated seamline or garment edge.
I hope you found this post helpful and it inspires you to get creative and start drafting your own flounce design to add to your garments! Remember to check out the video tutorial, you can use the link in this blog post or head over to my YouTube channel at YouTube.com/@soneradesign
P.S. Be sure to subscribe to the channel so that you don't miss out on future videos!
Stay fabulous my friends!
Leave a comment